Environment
CentOS 6.4nexus 2.11.2-06
JDK 1.7.0_11
Procedure
Firstly, we have to install JDK. This is too piece-of-cake to elaborate here (you could google out bunch of tutorials).After installing JDK, we could download the latest version of Nexus (NEXUS OSS TGZ) from its website. untar it and copy it to '/home/workspace' directory.
vim '$NEXUS_HOME/conf/nexus.properties' and change 'nexus-work' variable to the path where your repository files will all be resided in. This path should be created manually before Nexus is launched. Meanwhile, you could change the default 'application-host' and 'application-port' to whatever you prefer.
Then, we could simple use `$NEXUS_HOME/bin/nexus start/stop` to manipulate Nexus service.
When Nexus starting, we could access via URL 'http://10.100.7.162:8081/nexus/' (In my case, it is an inner ip of our company). The default admin user is "admin" and password is "admin123".
As for the URL, we should always append the ending '/', otherwise it would fail to resolve the webpage.
Now, we could upload our own maven project, which will act as a dependency in other projects, to Nexus. In pom.xml, add the following code:
<pluginRepositories>
    <pluginRepository>
        <id>nexus</id>
        <name>nexus</name>
        <url>http://10.100.7.162:8081/nexus/content/groups/public/</url>
        <releases><enabled>true</enabled></releases>
        <snapshots><enabled>true</enabled></snapshots>
    </pluginRepository>
</pluginRepositories>


<distributionManagement>
    <repository>
        <id>nexus-releases</id>
        <name>Nexus Releases Repository</name>
        <url>http://10.100.7.162:8081/nexus/content/repositories/releases/</url>
    </repository>
    <snapshotRepository>
        <id>nexus-snapshots</id>
        <name>Nexus SnapShots Repository</name>
        <url>http://10.100.7.162:8081/nexus/content/repositories/snapshots/</url>
    </snapshotRepository>
</distributionManagement>
Then, we should `vim ~/.m2/settings.xml` and add the following code for the purpose of authentication:
<servers>
  <server>
    <id>nexus-releases</id>
    <username>admin</username>
    <password>admin123</password>
  </server>
  <server>
    <id>nexus-snapshots</id>
    <username>admin</username>
    <password>admin123</password>
  </server>
</servers>
Finally, we `cd` to the project's root directory, execute `maven clean deploy`. When finished, we should see our project's jar file and auxiliary configuration files is uploaded to our Nexus server.
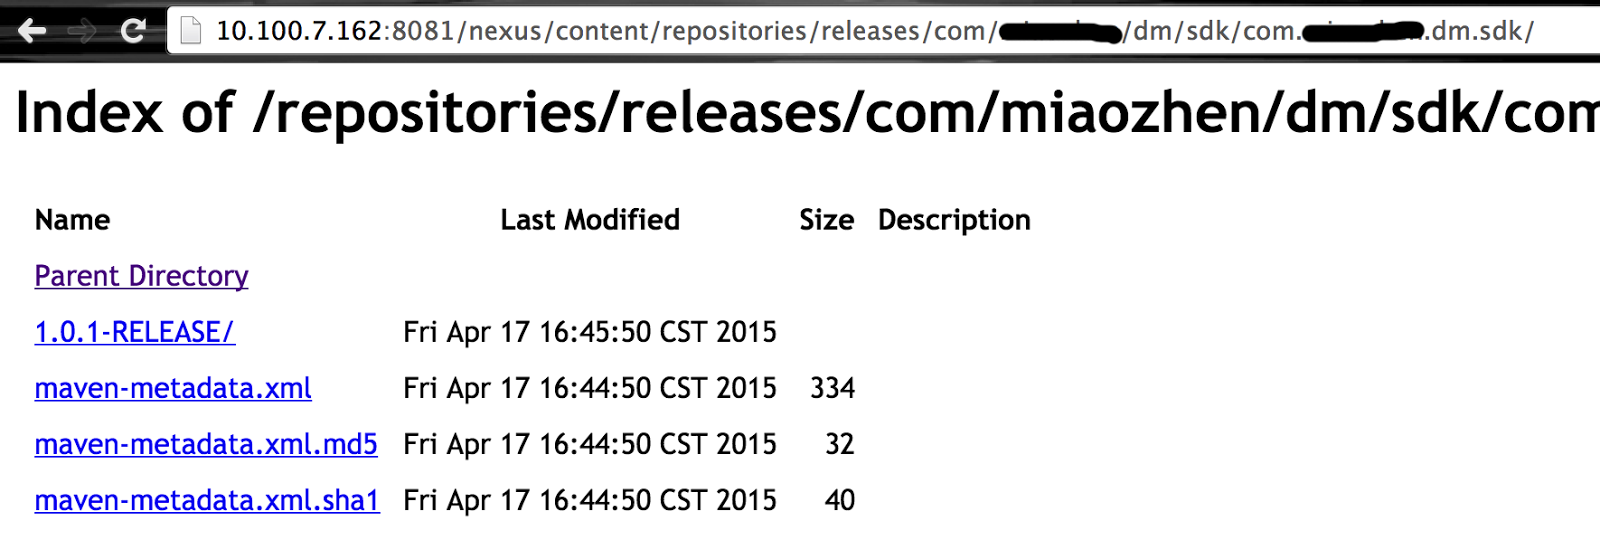
It's time to harvest and check on our private maven repository. Open a project which depends on the project we just uploaded to Nexus, open its pom.xml and add the following code to it:
<repositories>
    <repository>
        <id>nexus</id>
        <name>nexus</name>
        <url>http://10.100.7.162:8081/nexus/content/groups/public/</url>
        <releases>
            <enabled>true</enabled>
        </releases>
        <snapshots>
            <enabled>true</enabled>
        </snapshots>
    </repository>
</repositories>

<dependencies>
    <dependency>
        <groupId>com.XXX.dm.sdk</groupId>
        <artifactId>com.XXX.dm.sdk</artifactId>
        <version>1.0.1-RELEASE</version>
    </dependency>
</dependencies>

<pluginRepositories>
    <pluginRepository>
        <id>nexus</id>
        <name>nexus</name>
        <url>http://10.100.7.162:8081/nexus/content/groups/public/</url>
        <releases>
            <enabled>true</enabled>
        </releases>
        <snapshots>
            <enabled>true</enabled>
        </snapshots>
    </pluginRepository>
</pluginRepositories>
We could see that our private dependency is referenced correctly :]
Enhancement
#---1---# Beautify URL For Nexus ServiceIf we intend to resolve our content webpage to 'http://10.100.7.162/content/', without port specification as well as '/nexus/' heading part. we should set our '$NEXUS_HOME/conf/nexus.properties' like this:
# Jetty section
application-port=80
application-host=0.0.0.0
nexus-webapp=${bundleBasedir}/nexus
nexus-webapp-context-path=

# Nexus section
nexus-work=/home/data/nexus_repo
runtime=${bundleBasedir}/nexus/WEB-INF
In order to specify port to 80, we need to operate on Nexus as root user; And according to this post, put null in parameter 'nexus-webapp-context-path' would just do the trick removing the '/nexus/' heading.
#---2---# Increase Memory Of Nexus Service
We should increase the memory allocating to Nexus. This is well-explained in its official document.
epilogue
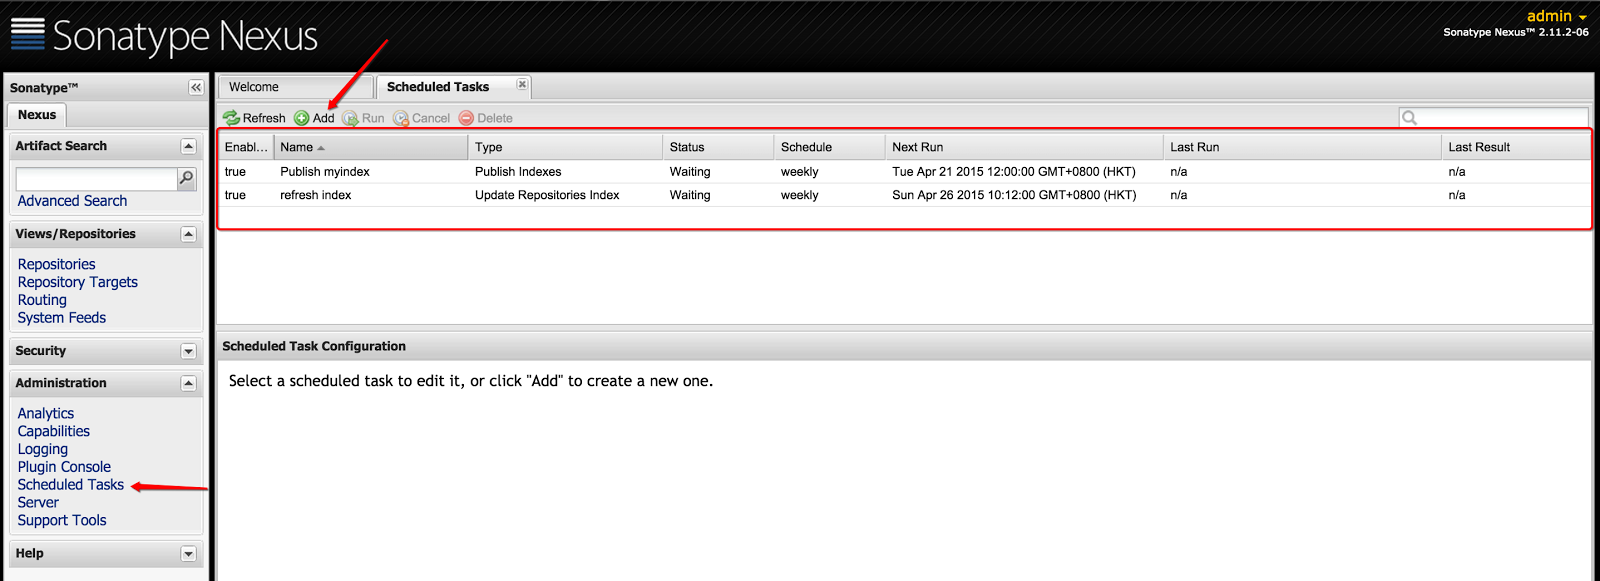
After running Nexus the first time, we should make some configurations before taking full advantage of it.#---1---# Adding Scheduled Tasks
The first thing to do is to add two scheduled tasks, namely, updating repositories index and publish indexes, as depicted below. The function of these scheduled tasks is described here, mainly to update proxy repositories information:
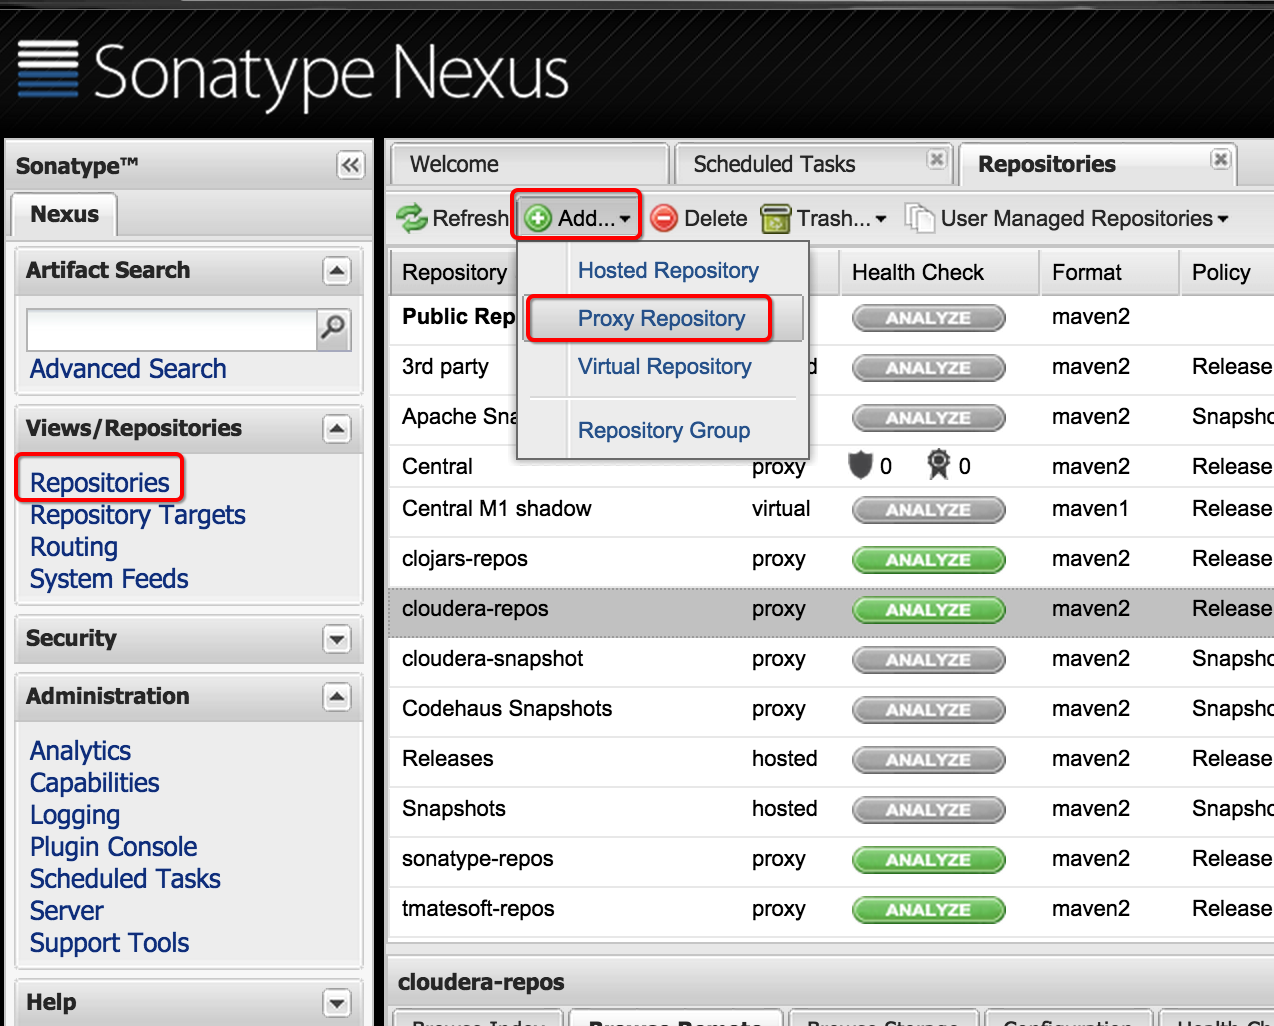
#---2---# Configuring Proxy Repositories
There are some commonly-used remote repositories which should be configured into our maven repository.
Firstly, we should add the proxy repository into our Repositories Module.
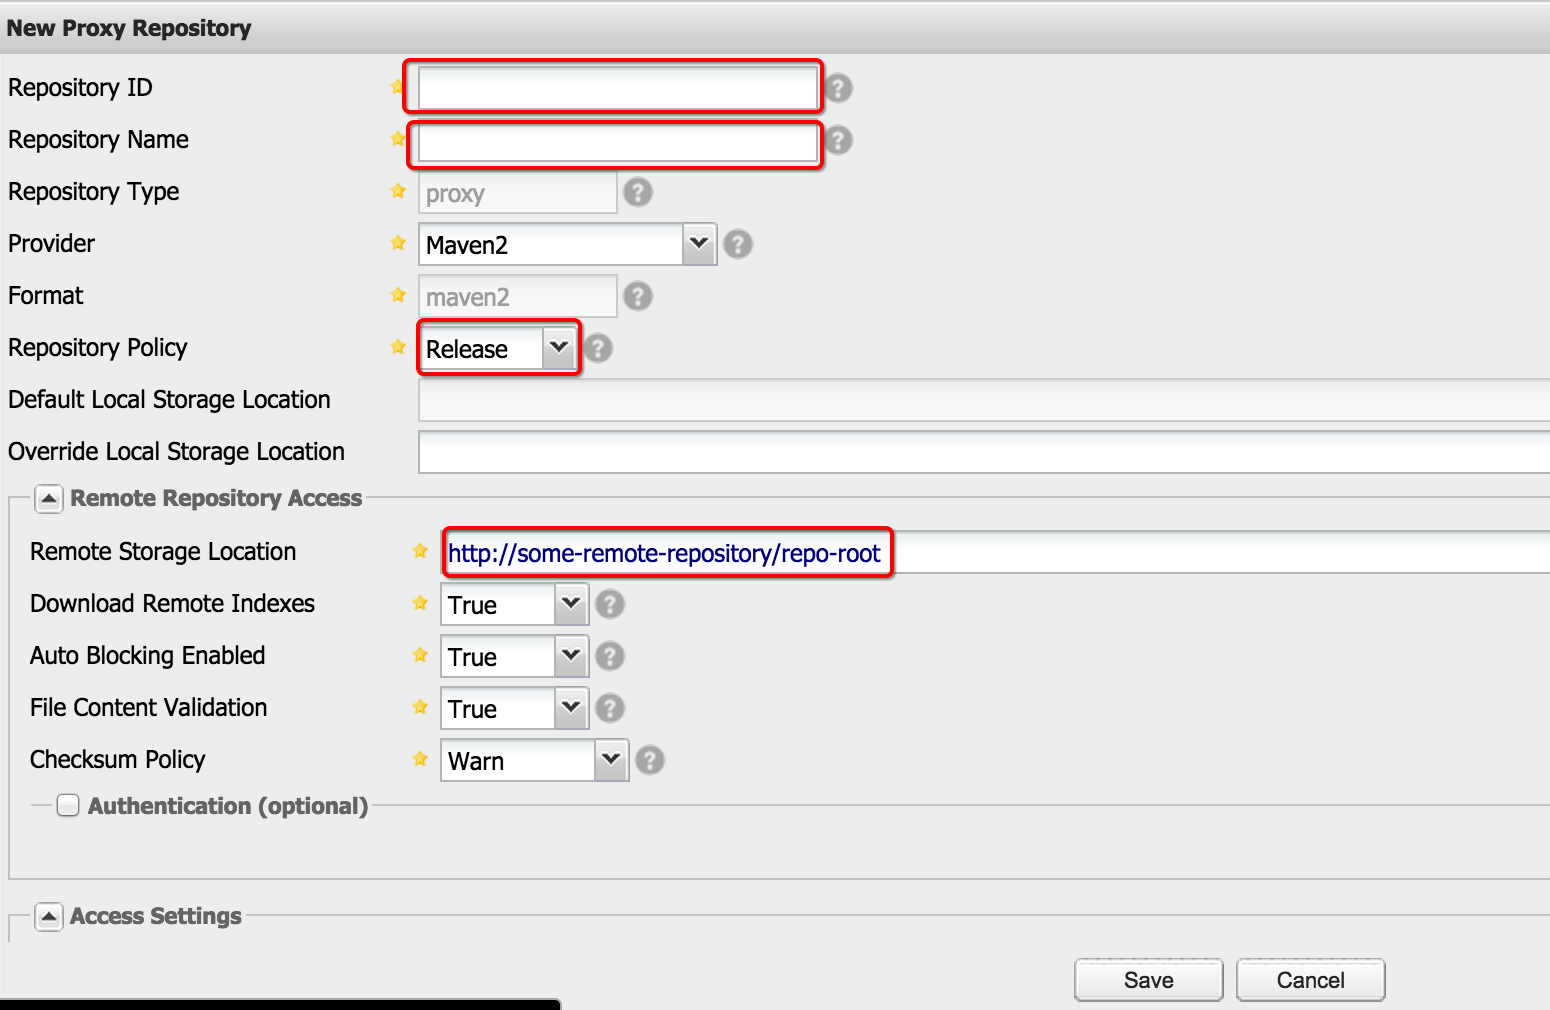
Next, append them into Public Repositories:
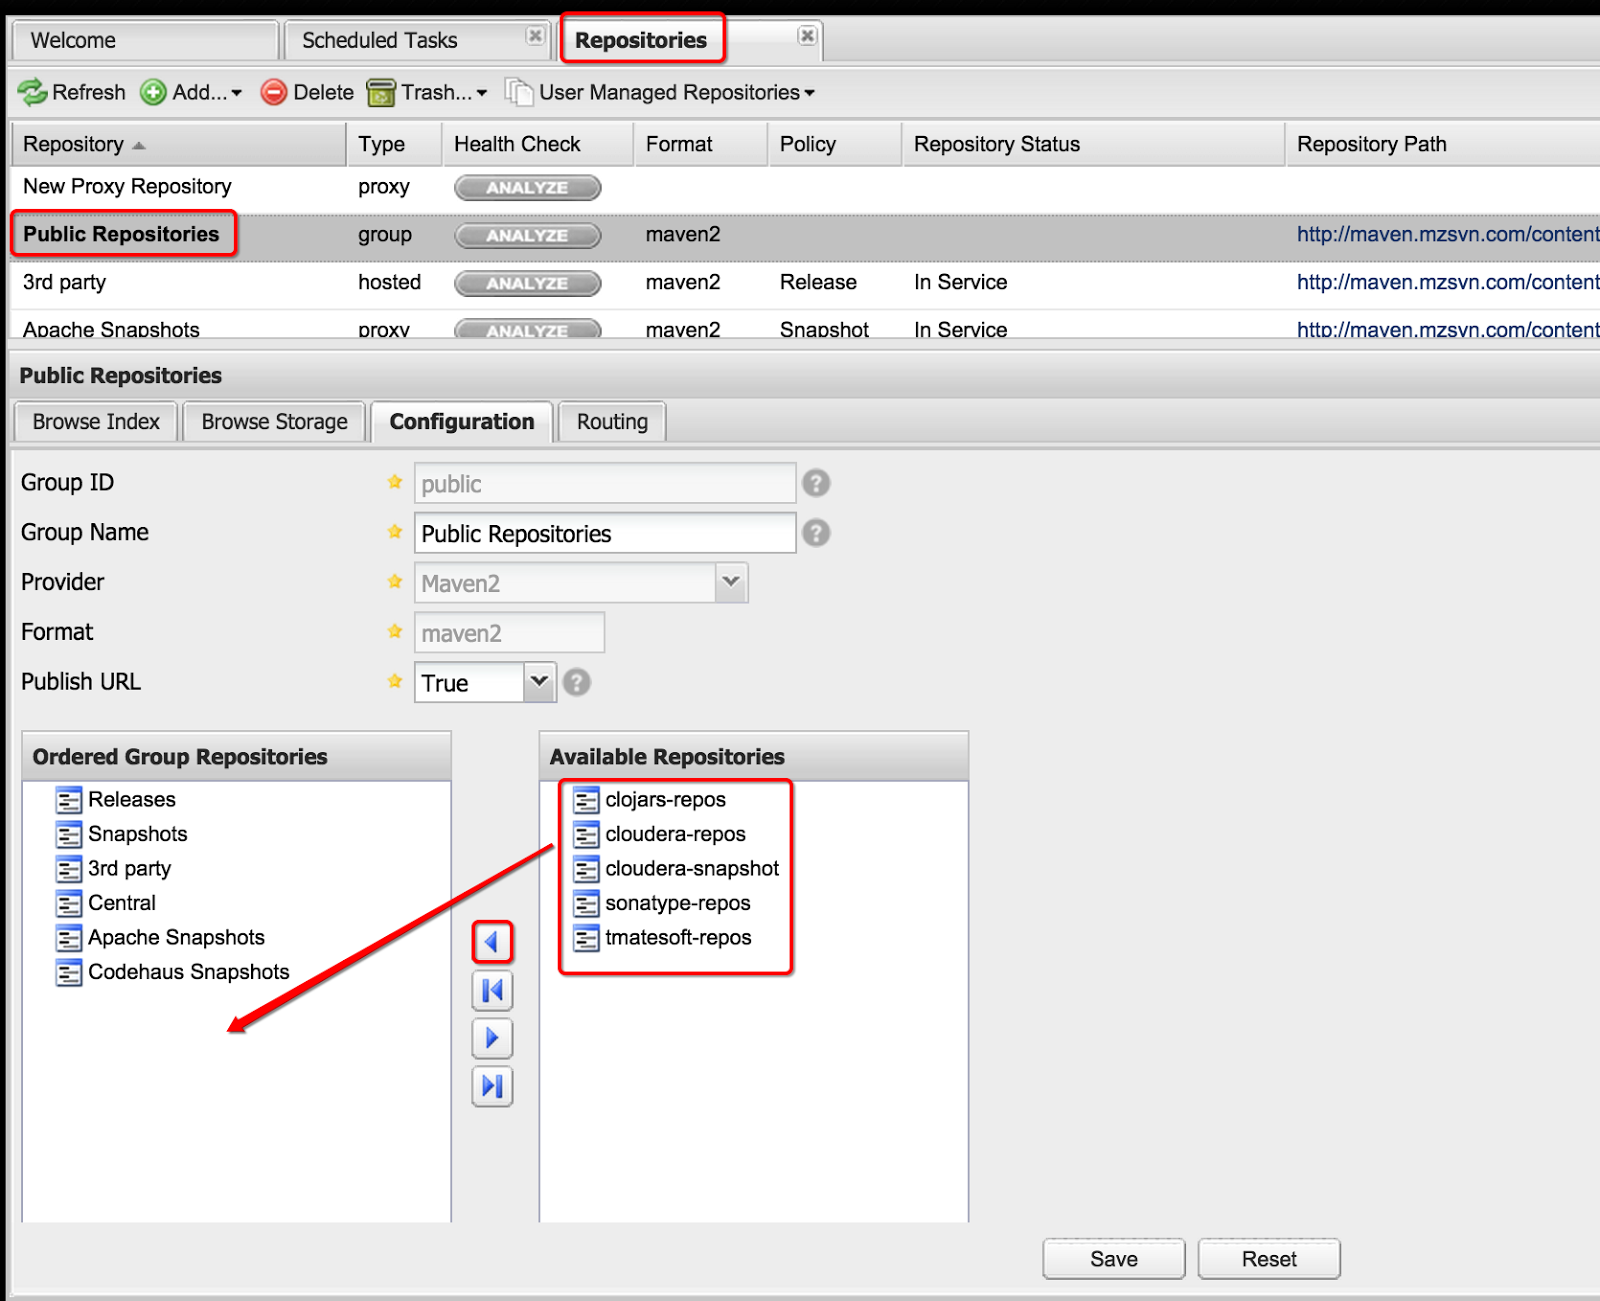
In this way, we could refer to almost all the common dependencies from our maven repository.
Reference:
1. Return code is: 401, ReasonPhrase:Unauthorized
2. Maven学习笔记(二、nexus仓库)
3. Maven学习笔记(三、maven配置nexus)
4. Linux 搭建Nexus
No comments:
Post a Comment