Since Restful HTTP API requested by iOS program must be in scheme HTTPS, an SSL certificate has to be encapsulated on our web service.
For experimental purpose, StartSSL is chose, which provides free-of-charge SSL certificate that are acknowledged by mainstream browsers like chrome, IE, etc.
Retrieve SSL Certificate from StartSSL
To get started, browse to StartSSL.com and using the toolbar on the left, navigate to StartSSL Products and then to StartSSL™ Free. Choose the link for Control Panel from the top of the page.
Make sure you are using Google Chrome
1. Choose the Express Signup. option
2. Enter your personal information, and click continue.
3. You'll get an email with a verification code inside it shortly. Copy and paste that email into the form on StartSSL's page.
4. They will review your request for a certificate and then send you an email with the new info. This process might take as long as 6 hours though, so be patient.
5. Once the email comes, use the link provided and the new authentication code (at the bottom of the email) to continue to the next step.
6. They will ask you to Generate a private key and you will be provided with the choice of "High" or "Medium" grade. Go ahead and choose "High".
7. Once your key is ready, click Install.
8. Chrome will show a popdown that says that the certificate has been successfully installed to Chrome.
This means your browser is now authenticated with your new certificate and you can log into the StartSSL authentication areas using your new certificate. Now, we need to get a properly formatted certificate set up for use on your VPS. Click on the Control panel link again, and choose the Authenticate option. Chrome will show a popup asking if you want to authenticate and will show the certificate you just installed. Go ahead and authenticate with that certificate to enter the control panel.
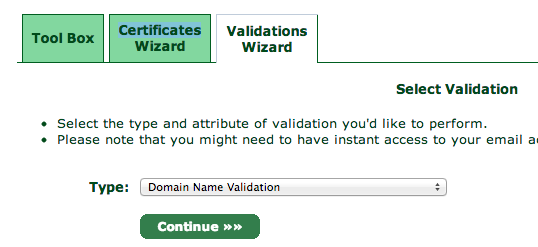
You will need to validate your domain name to prove that you own the domain you are setting up a certificate for. Click over to the Validations Wizard in the Control panel and set Type to Domain Name Validation. You'll be prompted to choose from an email at your domain, something like postmaster@yourdomain.com.
Check the email inbox for the email address you selected. You will get yet another verification email at that address, so like before, copy and paste the verification code into the StartSSL website.
Next, go to the Certificates Wizard tab and choose to create a Web Server SSL/TLS Certificate.

Hit continue and then enter in a secure password, leaving the other settings as is.
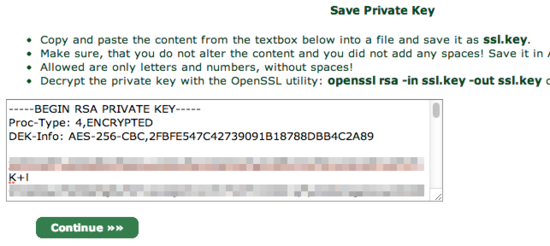
You will be shown a textbox that contains your private key. Copy and paste the contents into a text editor and save the data into a file called ssl.key.
When you click continue, you will be asked which domain you want to create the certificate for:
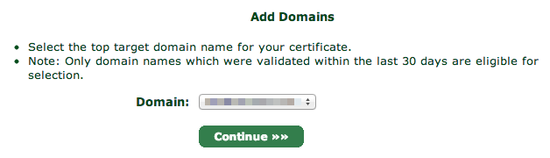
Choose your domain and proceed to the next step.
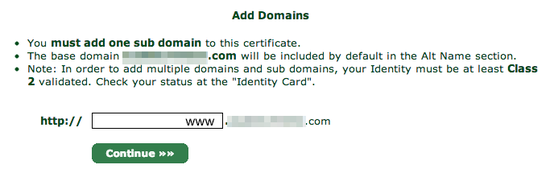
You will be asked what subdomain you want to create a certificate for. In most cases, you want to choose www here, but if you'd like to use a different subdomain with SSL, then enter that here instead:
StartSSL will provide you with your new certificate in a text box, much as it did for the private key:
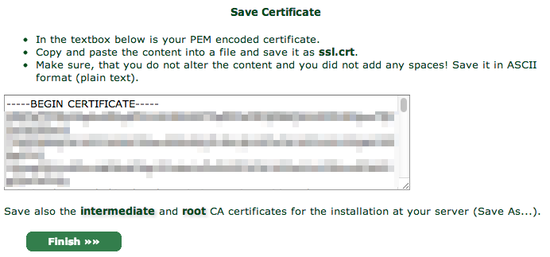
Again, copy and paste into a text editor, this time saving it as ssl.crt.
You will also need the StartCom Root CA and StartSSL's Class 1 Intermediate Server CA in order to authenticate your website though, so for the final step, go over to the Toolbox pane and choose StartCom CA Certificates:
At this screen, right click and Save As two files:
StartCom Root CA (PEM Encoded) (save to ca.pem)
Class 1 Intermediate Server CA (save to sub.class1.server.ca.pem)
For security reasons, StartSSL encrypts your private key (the ssl.key file), but your web server needs the unencrypted version of it to handle your site's encryption. To un-encrypt it, copy it onto your server, and use the following command to decrypt it into the file private.key:
openssl rsa -in ssl.key -out private.key
OpenSSL will ask you for your password, so enter it in the password you typed in on StartSSL's website.
At this point you should have five files. If you're missing any, double-check the previous steps and re-download them:
ca.pem - StartSSL's Root certificate
private.key - The unencrypted version of your private key (be very careful no one else has access to this file!)
sub.class1.server.ca.pem - The intermediate certificate for StartSSL
ssl.key - The encrypted version of your private key (does not need to be copied to server)
ssl.crt - Your new certificate
Configure Nginx to Handle HTTPS
The basic way for this configuration is provided on StartSSL official document,
how to install on Nginx server. Just one note, for Nginx configuration, we could simply integrate SSL settings with the HTTP one:
server {
    listen       80 default_server;
    listen       [::]:80 default_server;
    listen              443 ssl;     # Add for SSL
    server_name  _;

    ssl_certificate     /etc/nginx/sslconf/ssl-unified.crt;    # Add for SSL
    ssl_certificate_key /etc/nginx/sslconf/private.key;    # Add for SSL

    root         /usr/share/nginx/html;
    # Load configuration files for the default server block.
    include /etc/nginx/default.d/*.conf;

    location / {
        index index.html;
        proxy_pass http://test.hide.com:8888;
        proxy_cache nginx_cache;
        proxy_cache_key $host$uri$is_args$args;
        proxy_set_header Host  $host;
        proxy_set_header X-Forwarded-For  $remote_addr;
        expires  30d;
     }

    location ~ .*\.(ico|gif|jpg|jpeg|png|bmp)$
    {
            root   /home/hide/service/fileservice/;
    }

    location ~ .*\.(css|js|html)?$
    {
            root   /home/hide/service/fileservice/;
            expires 1h;
    }

    error_page 404 /404.html;
        location = /40x.html {
    }
    error_page 500 502 503 504 /50x.html;
        location = /50x.html {
    }

}
After executing `
service nginx restart`, we could simply access our website via https scheme.
REFERENCE:
1.
How To Set Up Apache with a Free Signed SSL Certificate on a VPS
2.
Setting-up Tomcat SSL with StartSSL Certificates
3.
StartSSL 免费证书申请步骤以及Tomcat和Apache下的安装
4.
SSL证书与Https应用部署小结
5.
Configuring HTTPS servers - Nginx
6.
Module ngx_http_ssl_module