Showing posts with label Nginx. Show all posts

Wednesday, May 16, 2018

hue后端的django请求HOST为domain时返回400 BAD REQUEST,ip+port则没问题排查思路

通过nginx反向代理到两台hue webserver服务后,发现wget dp-hue_nginx.company.com/hue会返回400 BAD REQUEST, 而请求服务对应的ip:portwget 192.168.1.121:8005/hue则没有问题。

继续找到问题来源,直接对某台hue webserver执行如下命令,发现上述问题可以复现,所以排除掉nginx的问题。
$ curl -I -H 'Host:dp-hue_nginx.corp.kuaishou.com' http://hue-webserver/accounts/login/?next=/
HTTP/1.1 400 BAD REQUEST
$ curl -I -H 'Host:127.0.0.1:8888' http://hue-webserver/accounts/login/?next=/
HTTP/1.1 200 OK
google得到相关post, 说设置allowed_hosts即可,检查$HUE_HOME/desktop/conf/hue.ini, 此参数默认为'*'.
再次google得到此文, 发现是个django的bug。在请求的host domain路径里不能包括下划线(underscore)。

Thursday, November 5, 2015

Configure SSL Certificate on Private Website Server

Since Restful HTTP API requested by iOS program must be in scheme HTTPS, an SSL certificate has to be encapsulated on our web service.

For experimental purpose, StartSSL is chose, which provides free-of-charge SSL certificate that are acknowledged by mainstream browsers like chrome, IE, etc.

Retrieve SSL Certificate from StartSSL

To get started, browse to StartSSL.com and using the toolbar on the left, navigate to StartSSL Products and then to StartSSL™ Free. Choose the link for Control Panel from the top of the page.

Make sure you are using Google Chrome

1. Choose the Express Signup. option
2. Enter your personal information, and click continue.
3. You'll get an email with a verification code inside it shortly. Copy and paste that email into the form on StartSSL's page.
4. They will review your request for a certificate and then send you an email with the new info. This process might take as long as 6 hours though, so be patient.
5. Once the email comes, use the link provided and the new authentication code (at the bottom of the email) to continue to the next step.
6. They will ask you to Generate a private key and you will be provided with the choice of "High" or "Medium" grade. Go ahead and choose "High".
7. Once your key is ready, click Install.
8. Chrome will show a popdown that says that the certificate has been successfully installed to Chrome.

This means your browser is now authenticated with your new certificate and you can log into the StartSSL authentication areas using your new certificate. Now, we need to get a properly formatted certificate set up for use on your VPS. Click on the Control panel link again, and choose the Authenticate option. Chrome will show a popup asking if you want to authenticate and will show the certificate you just installed. Go ahead and authenticate with that certificate to enter the control panel.

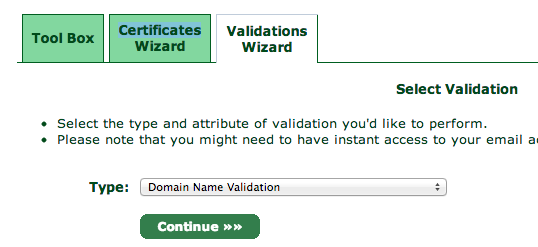
You will need to validate your domain name to prove that you own the domain you are setting up a certificate for. Click over to the Validations Wizard in the Control panel and set Type to Domain Name Validation. You'll be prompted to choose from an email at your domain, something like postmaster@yourdomain.com.

StartSSL

Check the email inbox for the email address you selected. You will get yet another verification email at that address, so like before, copy and paste the verification code into the StartSSL website.

Next, go to the Certificates Wizard tab and choose to create a Web Server SSL/TLS Certificate.

Start SSL

Hit continue and then enter in a secure password, leaving the other settings as is.

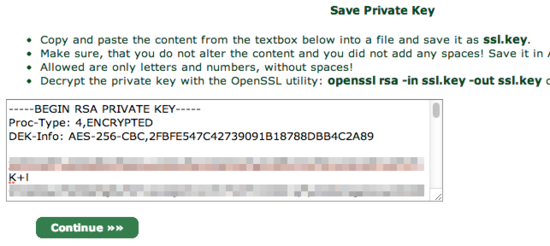
You will be shown a textbox that contains your private key. Copy and paste the contents into a text editor and save the data into a file called ssl.key.

Private Key

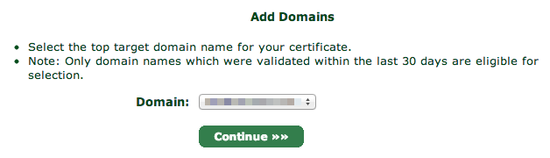
When you click continue, you will be asked which domain you want to create the certificate for:

Choose Domain

Choose your domain and proceed to the next step.

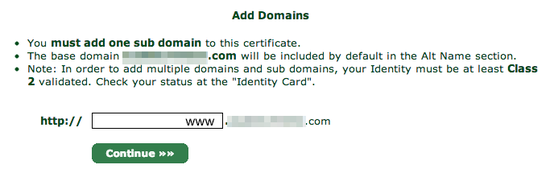
You will be asked what subdomain you want to create a certificate for. In most cases, you want to choose www here, but if you'd like to use a different subdomain with SSL, then enter that here instead:

Add Subdomain

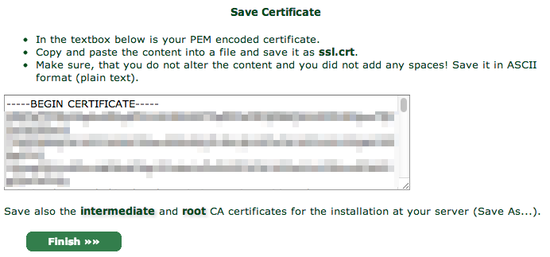
StartSSL will provide you with your new certificate in a text box, much as it did for the private key:

Save Certificate

Again, copy and paste into a text editor, this time saving it as ssl.crt.

You will also need the StartCom Root CA and StartSSL's Class 1 Intermediate Server CA in order to authenticate your website though, so for the final step, go over to the Toolbox pane and choose StartCom CA Certificates:

Startcome CA Certs

At this screen, right click and Save As two files:

StartCom Root CA (PEM Encoded) (save to ca.pem)
Class 1 Intermediate Server CA (save to sub.class1.server.ca.pem)

For security reasons, StartSSL encrypts your private key (the ssl.key file), but your web server needs the unencrypted version of it to handle your site's encryption. To un-encrypt it, copy it onto your server, and use the following command to decrypt it into the file private.key:

openssl rsa -in ssl.key -out private.key

OpenSSL will ask you for your password, so enter it in the password you typed in on StartSSL's website.

At this point you should have five files. If you're missing any, double-check the previous steps and re-download them:

ca.pem - StartSSL's Root certificate
private.key - The unencrypted version of your private key (be very careful no one else has access to this file!)
sub.class1.server.ca.pem - The intermediate certificate for StartSSL
ssl.key - The encrypted version of your private key (does not need to be copied to server)
ssl.crt - Your new certificate

Configure Nginx to Handle HTTPS

The basic way for this configuration is provided on StartSSL official document, how to install on Nginx server. Just one note, for Nginx configuration, we could simply integrate SSL settings with the HTTP one:

server {
    listen       80 default_server;
    listen       [::]:80 default_server;
    listen              443 ssl;     # Add for SSL
    server_name  _;

    ssl_certificate     /etc/nginx/sslconf/ssl-unified.crt;    # Add for SSL
    ssl_certificate_key /etc/nginx/sslconf/private.key;    # Add for SSL

    root         /usr/share/nginx/html;
    # Load configuration files for the default server block.
    include /etc/nginx/default.d/*.conf;

    location / {
        index index.html;
        proxy_pass http://test.hide.com:8888;
        proxy_cache nginx_cache;
        proxy_cache_key $host$uri$is_args$args;
        proxy_set_header Host  $host;
        proxy_set_header X-Forwarded-For  $remote_addr;
        expires  30d;
     }

    location ~ .*\.(ico|gif|jpg|jpeg|png|bmp)$
    {
            root   /home/hide/service/fileservice/;
    }

    location ~ .*\.(css|js|html)?$
    {
            root   /home/hide/service/fileservice/;
            expires 1h;
    }

    error_page 404 /404.html;
        location = /40x.html {
    }
    error_page 500 502 503 504 /50x.html;
        location = /50x.html {
    }

}

After executing  `service nginx restart`, we could simply access our website via https scheme.


REFERENCE:
1. How To Set Up Apache with a Free Signed SSL Certificate on a VPS
2. Setting-up Tomcat SSL with StartSSL Certificates
3. StartSSL 免费证书申请步骤以及Tomcat和Apache下的安装
4. SSL证书与Https应用部署小结
5. Configuring HTTPS servers - Nginx
6. Module ngx_http_ssl_module


Wednesday, April 22, 2015

Arm Nginx With 'Keepalived' For High Availability (HA)

Prerequisite

After obtaining a general understanding and grasp on the basics of  Nginx deployed upon Vagrant environment, which could be found at this post, today I'm gonna enhance my load balancer with a tool named 'Keepalived' for the purpose of keeping it HA.

Keepalived is a routing software whose main goal is to provide simple and robust facilities for load balancing and high-availability to Linux system and Linux based infrastructures.

There're 4 vagrant envs, from node1(192.168.10.10) to node4(192.168.10.13) respectively. I intend to deploy Nginx and Keepalived on node1 and node2, whereas NodeJS resides in node3 and node4 supplying with web service.

The network interfaces on every node resembles:
[root@node1 vagrant]# ip addr
1: lo: <LOOPBACK,UP,LOWER_UP> mtu 16436 qdisc noqueue state UNKNOWN 
    link/loopback 00:00:00:00:00:00 brd 00:00:00:00:00:00
    inet 127.0.0.1/8 scope host lo
    inet6 ::1/128 scope host 
       valid_lft forever preferred_lft forever
2: eth0: <BROADCAST,MULTICAST,UP,LOWER_UP> mtu 1500 qdisc pfifo_fast state UP qlen 1000
    link/ether 08:00:27:ae:97:4f brd ff:ff:ff:ff:ff:ff
    inet 10.0.2.15/24 brd 10.0.2.255 scope global eth0
    inet6 fe80::a00:27ff:feae:974f/64 scope link 
       valid_lft forever preferred_lft forever
3: eth1: <BROADCAST,MULTICAST,UP,LOWER_UP> mtu 1500 qdisc pfifo_fast state UP qlen 1000
    link/ether 08:00:27:61:c2:b2 brd ff:ff:ff:ff:ff:ff
    inet 192.168.10.10/24 brd 192.168.10.255 scope global eth1
    inet6 fe80::a00:27ff:fe61:c2b2/64 scope link 
       valid_lft forever preferred_lft forever

As we can see, all our inner IP communications are on 'eth1' interface. Thus we will create our virtual IP on 'eth1'.

Install Keepalived

It's quite easy to deploy it on my vagrant env (CentOS), `yum install keepalived` will do all the jobs for u.

Vim '/etc/keepalived/keepalived.conf' to configure Keepalived for both node1 and node2. All is the same BUT the 'priority' parameter: setting to 101 and 100 respectively.
vrrp_instance VI_1 {
        interface eth1
        state MASTER
        virtual_router_id 51
        priority 101
        authentication {
            auth_type PASS
            auth_pass Add-Your-Password-Here
        }
        virtual_ipaddress {
            192.168.10.100/24 dev eth1 label eth1:vi1
        }
}

In this way, we've set up a virtual interface 'eth1:vi1' with the IP address 192.168.10.100.

Start Keepalived by issuing command `/etc/init.d/keepalived start` on both nodes. We should see that there's a multiple IP address configured on 'eth1' interface via command `ip addr` on the node which starts Keepalived first:
[root@node2 conf.d]# ip addr
1: lo: <LOOPBACK,UP,LOWER_UP> mtu 16436 qdisc noqueue state UNKNOWN 
    link/loopback 00:00:00:00:00:00 brd 00:00:00:00:00:00
    inet 127.0.0.1/8 scope host lo
    inet6 ::1/128 scope host 
       valid_lft forever preferred_lft forever
2: eth0: <BROADCAST,MULTICAST,UP,LOWER_UP> mtu 1500 qdisc pfifo_fast state UP qlen 1000
    link/ether 08:00:27:ae:97:4f brd ff:ff:ff:ff:ff:ff
    inet 10.0.2.15/24 brd 10.0.2.255 scope global eth0
    inet6 fe80::a00:27ff:feae:974f/64 scope link 
       valid_lft forever preferred_lft forever
3: eth1: <BROADCAST,MULTICAST,UP,LOWER_UP> mtu 1500 qdisc pfifo_fast state UP qlen 1000
    link/ether 08:00:27:3d:42:e0 brd ff:ff:ff:ff:ff:ff
    inet 192.168.10.11/24 brd 192.168.10.255 scope global eth1
    inet 192.168.10.100/24 scope global secondary eth1:vi1
    inet6 fe80::a00:27ff:fe3d:42e0/64 scope link 
       valid_lft forever preferred_lft forever

In my case, it is node2 who currently is the master of Keepalived. When shutting down node2 from host machine with command `vagrant suspend node2`, we could see that this secondary IP address '192.168.10.100' switches to node1. At this time, we should be able to `ping 192.168.10.100` from any nodes successfully.

Combine With Nginx

Now it's time to take full advantage of Keepalived to avoid Nginx (our load balancer) from single point of failure (SPOF). `vim /etc/nginx/conf.d/virtual.conf` to revise Nginx configuration file:
upstream nodejs {
    server 192.168.10.12:1337;
    server 192.168.10.13:1337;
    keepalive 64;    # maintain a maximum of 64 idle connections to each upstream server
}

server {
    listen 80;
    server_name 192.168.10.100
                127.0.0.1;
    access_log /var/log/nginx/test.log;
    location / {
        proxy_set_header X-Real-IP $remote_addr;
        proxy_set_header X-Forwarded-For $proxy_add_x_forwarded_for;
        proxy_set_header Host  $http_host;
        proxy_set_header X-Nginx-Proxy true;
        proxy_set_header Connection "";
        proxy_pass      http://nodejs;

    }
}

In our 'server_name' parameter, we set both the Virtual IP set by Keepalived and localhost IP. The former one is for HA whereas the latter is for vagrant port forwarding.

Luanch Nginx service on both node1 and node2, meanwhile, run NodeJS on node3 and node4. Then we should be able to retrieve the web content on any nodes via command `curl http://192.168.10.100` as well as `curl http://127.0.0.1`. Shutting down either node1 or node2 will not affect any node retrieving web content via `curl http://192.168.10.100`.


Related Post:
1. Guide On Deploying Nginx And NodeJS Upon Vagrant On MAC


Reference:
1. keepalived Vagrant demo setup - GitHub
2. How to assign multiple IP addresses to one network interface on CentOS
3. Nginx - Server names


Wednesday, April 8, 2015

Guide On Deploying Nginx And NodeJS Upon Vagrant On MAC

Today, I'm gonna deploy NodeJS, masking with Nginx at the front-end, upon Vagrant, which is lightweight, reproducible, and portable development environments based on virtual machine, on Mac OSX. So, let's get our feet wet!

Experimental Environment

1. Mac OSX 10.9
2. Vagrant 1.7.2
3. VirtualBox-4.3.14-95030-OSX
4. CentOS6.5.box
5. Nginx 1.6.2
6. NodeJS 0.12.2

Items from 2 to 4 can be downloaded from here, while the installation of Item[5] is at its official document, Item[6] at this site.

Install Vagrant And Deploy Nginx, NodeJS On Vagrant

Firstly, invoke the following prompt for preparation:
mkdir ~/vagrant
mkdir ~/vagrant/box
mkdir ~/vagrant/dev
mv ~/Download/centos6.5.box ~/vagrant/box

The `box` subdir is for our .box file, while `dev` subdir is for current "Vagrantfile" instance.

Now let's initial our first vagrant environment with commands as below:
vagrant box add centos ~/vagrant/box/centos6.5.box  # Load the centos6.5.box into VirtualBox
cd ~/vagrant/dev
vagrant init centos # Initial the above box, which will generate the 'Vagrantfile' file
vagrant up # Start up the vagrant environment corresponding to config in the 'Vagrantfile' file
vagrant ssh # ssh to the vagrant environment

In which, 'Vagrantfile' is the place where configurations resides, we'll see it later. `vagrant ssh` command is the abbreviation of `vagrant ssh default`, since we don't specify a name explicitly for current vagrant environment in 'Vagrantfile', it applies 'default' as its name.

Some relative and commonly-used vagrant commands are listed here for reference (we could simply invoke `vagrant` to check out elaborate information on sub-commands):
vagrant halt # Close current vagrant env and save data and cache on disk
vagrant destroy # Close current vagrant env and dispose all the data. The next time when calling `vagrant up`, it will initial vagrant upon 'Vagrantfile' from scratch
vagrant global-status # list current vagrant envs status

After logging in the vagrant environment, we could install Nginx and NodeJS as illustrated in the aforementioned URL.  As for Nginx, root user is needed. For vagrant env, the default root's password is 'vagrant'.

Implement HelloWorld Upon NodeJS And Access From Host's Browser

In the 'default' vagrant env, `vim ~/helloworld.js`:
var http = require('http');
http.createServer(function (req, res) {
  console.log(req.url);
  res.writeHead(200, {'Content-Type': 'text/plain', 'Content-Type': 'application/json;charset=utf-8'});
  res.end('Hello Jason!');
}).listen(1337, "0.0.0.0");
console.log('Server running at http://0.0.0.0:1337/');

In which, we should listen to '0.0.0.0' rather than '127.0.0.1' provided that we intend to access it from our host's browser later on. The reason is well-explained here (Empty reply from server - can't connect to vagrant vm w/port forwarding).

After editing this .js file, we could fire it up via `node helloworld.js`. Next, open a new prompt window, login to the same vagrant env and execute `curl 127.0.0.1:1337`, we should see the html content returning from NodeJS server.

However, we cannot access this webpage through host's browser since the vagrant env and host resides in totally different IP segments. This could be solved by port forwarding technique, which is well-illustrated in the official document.

In our scenario, we simply add the following configuration in 'Vagrantfile' file.
config.vm.network :forwarded_port, host: 4567, guest: 1337

In this way, we could access at http://127.0.0.1:4567 from host machine to the NodeJS server in vagrant env.

Mask NodeJS With Nginx

Now, we are going to mask NodeJS with Nginx, though there's only one NodeJS server at this time.

Configuration of Nginx is as follows, via `vim /etc/nginx/conf.d/virtual.conf`:
upstream nodejs {
    server 127.0.0.1:1337;
    keepalive 64;
}

server {
    listen 80;
    server_name 127.0.0.1;
    access_log /var/log/nginx/test.log;
    location / {
        proxy_set_header X-Real-IP $remote_addr;
        proxy_set_header X-Forwarded-For $proxy_add_x_forwarded_for;
        proxy_set_header Host  $http_host;
        proxy_set_header X-Nginx-Proxy true;
        proxy_set_header Connection "";
        proxy_pass      http://nodejs;
    }
}

By masking with Nginx, we should access http://127.0.0.1:80, then Nginx will assign our http request to its upstream (In current scenario, it is 127.0.0.1:1337). Start nginx via command `service nginx start` in root user.

Meanwhile, we should change our 'Vagrantfile' file so as to 'port forwarding' to 127.0.0.1:80.
config.vm.network :forwarded_port, host: 4567, guest: 80

Restart vagrant env by `vagrant reload`, login to vagrant env starting Nginx as well as NodeJS server. Eventually, we should be able to access NodeJS server at http://127.0.0.1:4567 from host.

Create Box From Current Vagrant Environment

To obtain a snapshot of current vagrant env, in which Nginx and NodeJS have installed, we could create a .box file from current vagrant env via command:
vagrant package --output /yourfolder/OUTPUT_BOX_NAME.box

Create Multiple Vagrant Environments In A Single Vagrantfile

After all the work above, we are ready to create multiple vagrant envs in a single 'Vagrantfile' file, which looks as follows:
Vagrant.configure(2) do |config|
  #config.vm.box = "jason_web"
  #config.vm.network :forwarded_port, host: 4567, guest: 80
  
  config.vm.define :node1 do |node1|
      node1.vm.box = "jason_web"
      node1.vm.host_name = "node1"
   node1.vm.network :forwarded_port, host: 4567, guest: 80
      node1.vm.network "private_network", ip:"192.168.10.10"
      config.vm.provider :virtualbox do |vb|
          vb.customize ["modifyvm", :id, "--memory", "1024"]
          vb.customize ["modifyvm", :id, "--cpus", "2"]
      end 
  end 
  
  config.vm.define :node2 do |node2|
      node2.vm.box = "jason_web"
      node2.vm.host_name = "node2"
      node2.vm.network "private_network", ip:"192.168.10.11"
      config.vm.provider :virtualbox do |vb|
          vb.customize ["modifyvm", :id, "--memory", "512"]
          vb.customize ["modifyvm", :id, "--cpus", "2"]
      end 
  end 
  
  config.vm.define :node3 do |node3|
      node3.vm.box = "jason_web"
      node3.vm.host_name = "node3"
      node3.vm.network "private_network", ip:"192.168.10.12"
      config.vm.provider :virtualbox do |vb|
          vb.customize ["modifyvm", :id, "--memory", "512"]
          vb.customize ["modifyvm", :id, "--cpus", "2"]
      end 
  end 
  
  config.vm.define :node4 do |node4|
      node4.vm.box = "jason_web"
      node4.vm.host_name = "node4"
      node4.vm.network "private_network", ip:"192.168.10.13"
      config.vm.provider :virtualbox do |vb|
          vb.customize ["modifyvm", :id, "--memory", "512"]
          vb.customize ["modifyvm", :id, "--cpus", "2"]
      end 
  end 

The configuration items are all self-explained well in the above configuration. The obvious difference between 'node1' and the others is that it has a port forwarding setting for the purpose of accessing Nginx service running at 'node1'.

If we intend to ssh from nodeA to nodeB, the default password for ssh is 'vagrant', which is the same as the root's password.

Login 'node1' and reconfigure the Nginx 'virtual.conf' as follows, then start it up!
upstream nodejs {
    server 192.168.10.10:1337;
    server 192.168.10.11:1337;
    server 192.168.10.12:1337;
    server 192.168.10.13:1337;
    keepalive 64;
}

server {
    listen 80;
    server_name 127.0.0.1;
    access_log /var/log/nginx/test.log;
    location / {
        proxy_set_header X-Real-IP $remote_addr;
        proxy_set_header X-Forwarded-For $proxy_add_x_forwarded_for;
        proxy_set_header Host  $http_host;
        proxy_set_header X-Nginx-Proxy true;
        proxy_set_header Connection "";
        proxy_pass      http://nodejs;
    }
}

Eventually, login to each node and start NodeJS server respectively. At this time, we should be able to access Nginx service from http://127.0.0.1:4567 on host machine, and http requests is distributed to different NodeJS servers.

Performance Benchmark Current Webserver

We could use Apache Benchmark toolkit to test our distributed webserver, whose command resembles:
ab -k -c 350 -n 20000 http://127.0.0.1:4567/

'-c' means 'concurrent', -k for 'keepalive', while '-n' stands for 'total request amount'. For more detailed guide on how to take advantage of it to the maximum, we could refer to this post.

For Mac OSX, there's a bug on `ab` command, which could be patched illustrating in this link.


Reference
1. Nginx Tutorial - Proxy to Express Application, Load Balancer, Static Cache Files
2. mac下vagrant 的使用入门
3. VAGRANTDOCS - GETTING STARTED
4. Removing list of vms in vagrant cache
5. How to run node.js Web Server on nginx in Centos 6.4
6. NodeJs的安装 Hello World!